
How to Self-Host n8n on a Hostinger VPS (2026 Guide)
Self-host n8n on a Hostinger VPS in 2026: one-click template vs Docker, real KVM pricing incl. renewals, HTTPS setup, and the backup routine that keeps it alive.

Why a VPS, and why Hostinger
Self-hosting n8n means the software is free, your executions are unlimited, and your data stays on a machine you control. I made the cost case in what free n8n actually costs and compared it against the hosted tools in n8n vs Make vs Zapier. This guide is the practical part: how to install n8n on a VPS, step by step, with the decisions that matter and the mistakes to skip.
Why Hostinger specifically: it is what I use, their smallest VPS handles n8n comfortably, and they ship a one-click n8n template that removes most of the setup. The same steps apply to almost any VPS provider, so if you prefer Hetzner or DigitalOcean, read on anyway.
What you need: n8n VPS requirements
Three things. First, a VPS plan: for n8n VPS hosting, Hostinger's KVM 1 is enough for a personal or small-business instance. As of November 2026 it costs $6.49 per month on a 24-month introductory term and renews at $11.99, with 4 GB of RAM and 50 GB of NVMe storage. n8n is light; 4 GB leaves comfortable headroom. Second, a domain or subdomain for your instance, because n8n requires a secure HTTPS connection and you will want a proper URL anyway. Third, about thirty minutes.
One honest note on the pricing: the headline rate is the introductory term. Budget for the renewal price from day one, not the teaser. Even at the renewal rate, the whole setup costs less than n8n Cloud's cheapest plan.
Install n8n with Hostinger's one-click template
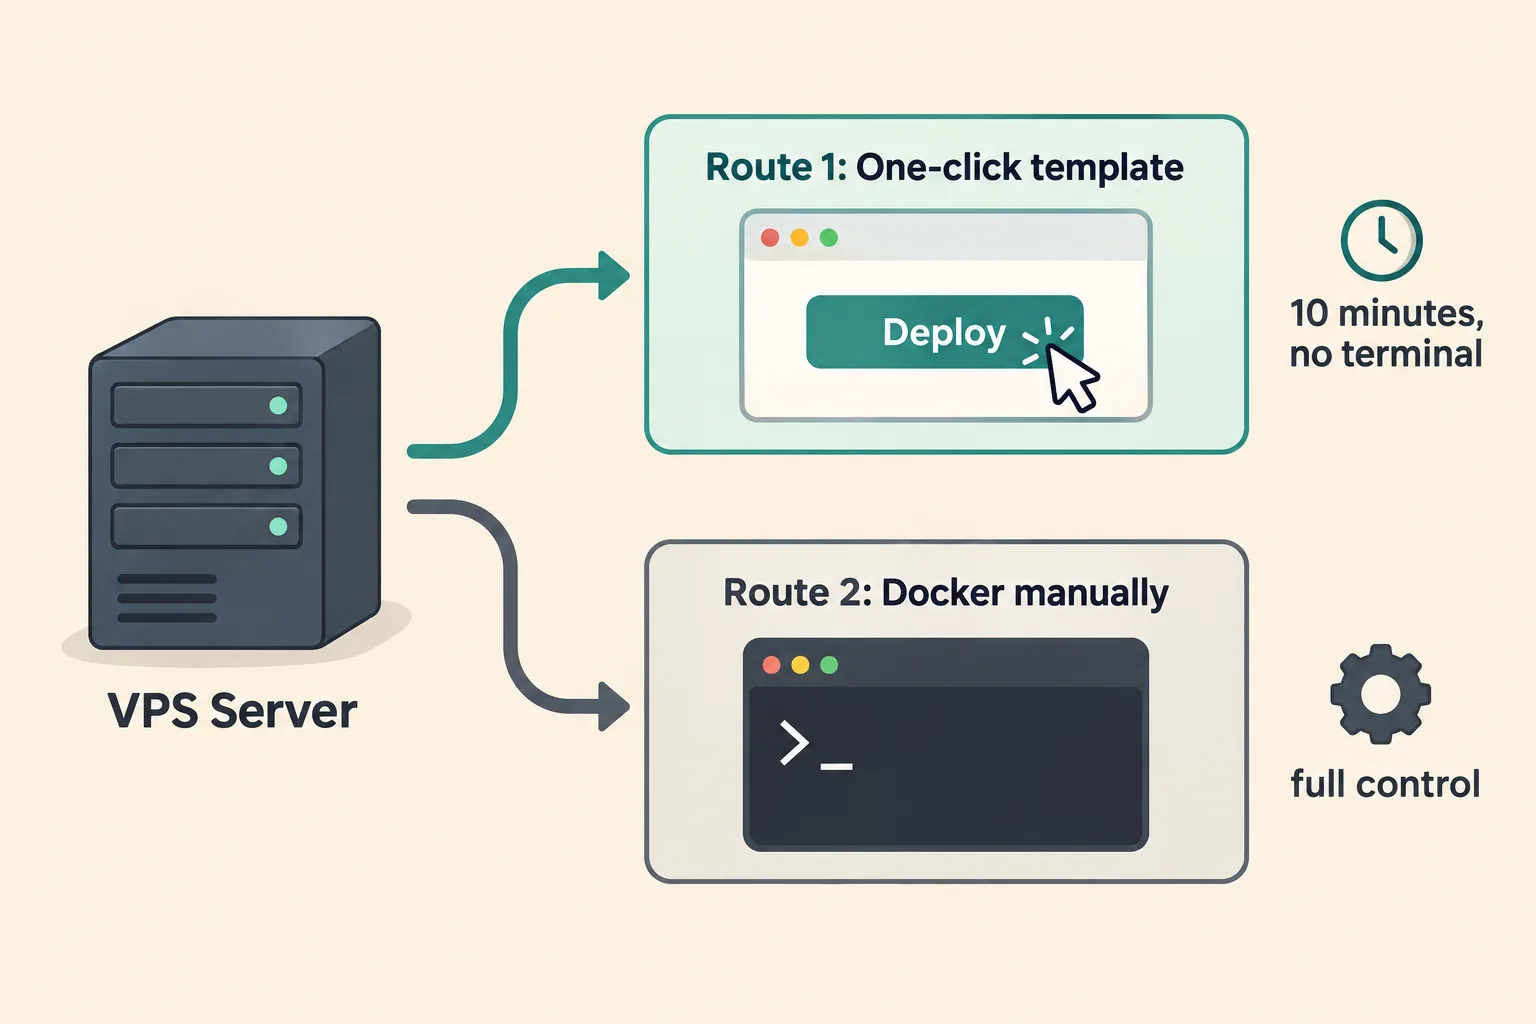
This is the route I recommend for a first Hostinger VPS n8n setup. Hostinger maintains an OS template that installs and configures n8n with its dependencies, and it is the safest option because their system handles the configuration:
- In hPanel, open your VPS and click Manage.
- In the left menu, open OS and Panel, then Operating System.
- In the Change OS panel, search for n8n and select the template. Hostinger offers three variants: plain n8n, n8n with queue mode for heavier loads, and n8n bundled with over a hundred pre-made workflows. Plain n8n is the right start.
- Set a root password when prompted and let the installer run; a progress bar tracks it at the top of the dashboard.
- When it finishes, use the Manage App button on the VPS overview page to open your fresh n8n instance and create your owner account.
No terminal, no commands, ten minutes. The trade-off is less control over how the containers are arranged, which most people never need.
Install n8n manually with Docker
If you want full control, install on a plain Ubuntu VPS with Docker. The fastest start is n8n's own one-line setup script:
curl -fsSL https://get.n8n.io | shFor a self-hosted n8n Docker setup you care about long-term, use Docker Compose from the official n8n hosting docs instead. The core of it is small:
services:
  n8n:
    image: n8nio/n8n
    restart: always
    ports:
      - "127.0.0.1:5678:5678"
    volumes:
      - n8n_data:/home/node/.n8n
volumes:
  n8n_data:
The n8n_data volume is where your SQLite database and encryption key live, so workflows survive container restarts. The full official file adds Traefik for automatic certificates and optional Postgres. One deprecation to know: installing via npm is no longer recommended as of n8n 3.0. Docker is the way, whichever route you pick.
My rule of thumb: start with the template. Move to manual Docker Compose when you have a reason, such as adding a reverse proxy configuration you want to own, or running other services on the same box.
Point your domain and enable HTTPS (NGINX + Let's Encrypt)
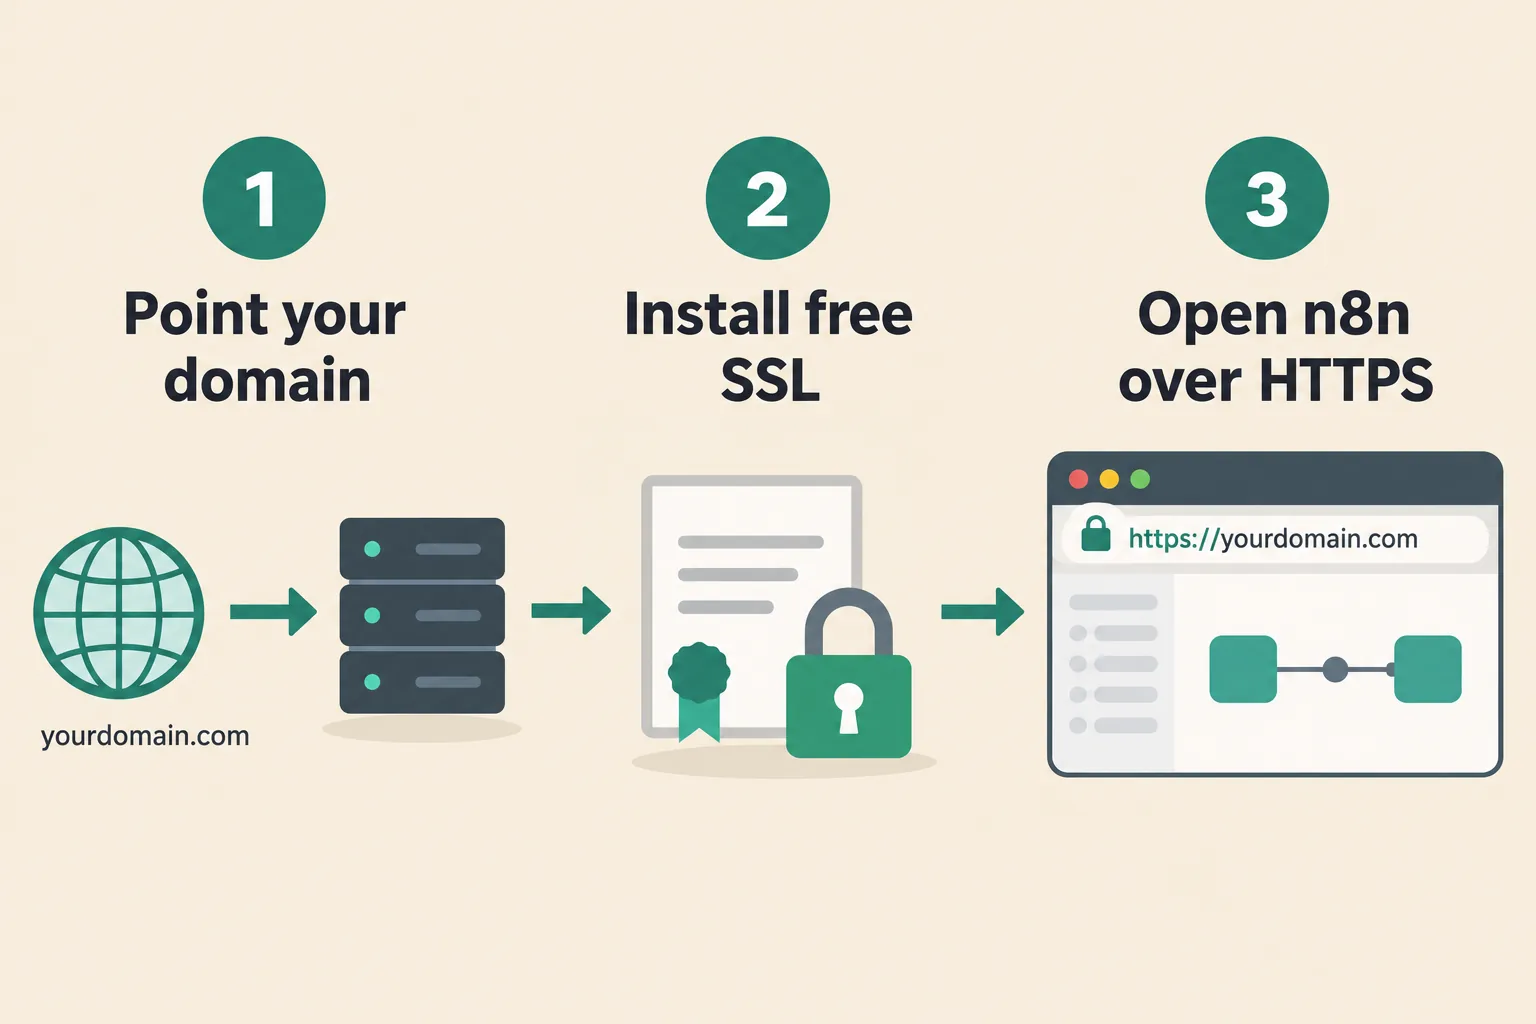
n8n expects a secure connection, so this step of the n8n HTTPS setup is not optional. The sequence is always the same three moves:
- Point an A record for your domain or subdomain, something like n8n.yourdomain.com, at your VPS IP address in your DNS provider.
- Put NGINX in front of n8n as a reverse proxy and get a free certificate from Let's Encrypt. The certbot tool does both the issue and the install in one command:
sudo certbot --nginx -d n8n.yourdomain.com. - Open your instance at its new https address and finish the owner setup.
Hostinger's own tutorial walks through the exact NGINX config blocks if you want to copy them.
One thing most quick guides skip: tell n8n its own public address. Behind a proxy, set N8N_HOST to your domain, N8N_PROTOCOL to https, and N8N_WEBHOOK_URL to https://n8n.yourdomain.com/ (on n8n versions before 2.30.0 the variable is called WEBHOOK_URL). Set N8N_EDITOR_BASE_URL to the same public https address so links in emails n8n sends point at the right place. Skip these and your webhook URLs and email links will say localhost, which breaks OAuth callbacks and shared links.
Troubleshooting the first week
- 502 Bad Gateway right after certbot: almost always means NGINX is proxying to a port nothing listens on. Check the container is actually running (
docker ps) and that your proxy_pass points at http://127.0.0.1:5678, n8n's default port. - Certificate renewal: certbot installs a systemd timer that renews certificates automatically. Verify it once with
sudo certbot renew --dry-run, then forget about it. - First login: open https://n8n.yourdomain.com in your browser and create the owner account there. After a Docker install, port 5678 only listens on the server's localhost, so the public https address is the way in.
Lock it down and keep it alive
A self-hosted instance is yours, including its security. The non-negotiables: serve n8n only behind HTTPS as above, keep the owner account on a strong unique password, and do not expose the editor to the open internet without authentication. If you only build from a fixed location, restricting the admin panel by IP at the firewall is cheap insurance.
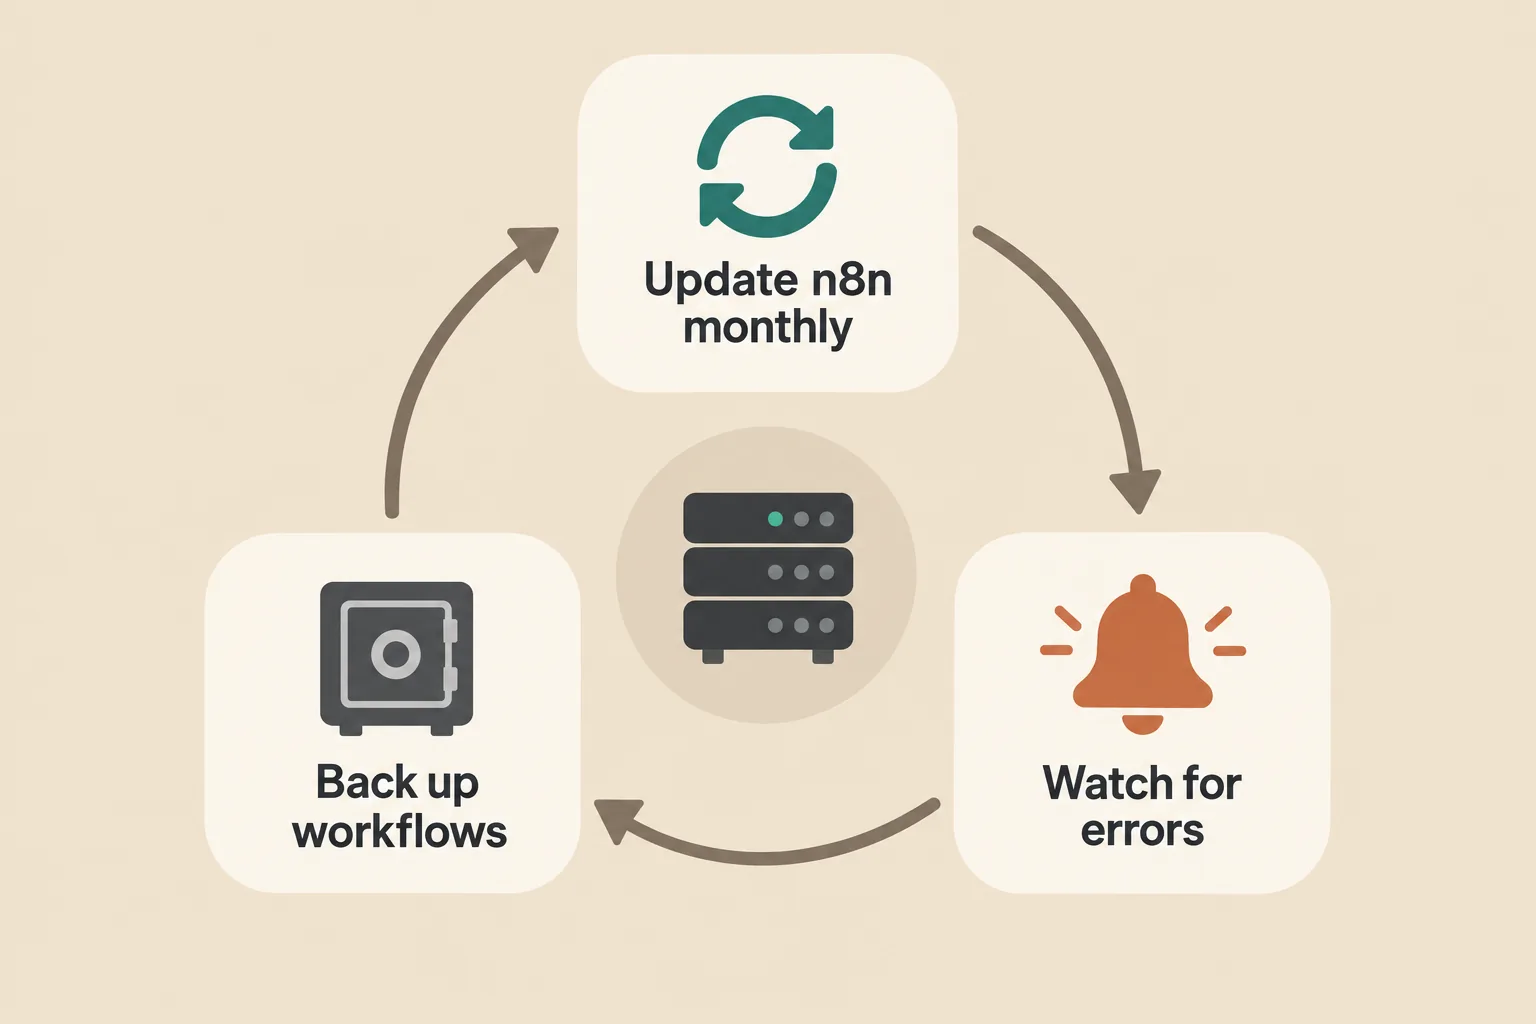
Then the ongoing care, which is lighter than people fear. Update n8n roughly monthly; with Docker an update is pulling the new image and restarting the container. Back up your workflows and credentials on a schedule you do not have to remember: I automated mine to Dropbox, and the whole workflow is in my n8n backup guide. And give yourself a way to notice failures before your clients do; my notes on logging n8n errors to Monday.com show the setup I use.
FAQ: self-hosting n8n on Hostinger
Is Hostinger good for self-hosting n8n? Yes. It is one of the cheapest VPS providers with an official one-click n8n template, the smallest plan runs n8n comfortably, and renewal pricing is honest once you know to look at it. Alternatives like Hetzner and Contabo play in the same price band.
Which Hostinger plan do I need for n8n? KVM 1 with 4 GB of RAM covers a personal or small-business instance with room to spare. Move up to KVM 2 when you run many heavy concurrent workflows or want queue mode.
Do I need to know Linux to self-host n8n? Not for the template route: it is a guided install with no commands. You will pick up the two or three Docker commands that matter, update and restart, within your first month.
How do I update n8n on a Hostinger VPS? With Docker, pull the latest n8n image and recreate the container; your workflows live in the database volume and survive. Template installs can also be updated through hPanel when a new template version ships. Always back up first.
Can I move my n8n instance away from Hostinger later? Yes. Export your workflows and credentials, or copy the data volume, and import them on any new server. Self-hosting means you are never locked into the host, only into your own backups.
Bottom line
Pick KVM 1, use the one-click template, point a domain, switch on HTTPS, automate your backups. That is the whole recipe, and it costs less per month than two coffees after the teaser rate ends. The day you outgrow it, Docker Compose and a bigger plan are a weekend project, not a migration.
Then put the instance to work: the first workflow to build is the email triage agent, because it pays for the server in saved hours within a month. Your workflows, your server, your rules.
Hostinger plan prices checked on hostinger.com in November 2026: KVM 1 at $6.49 per month on a 24-month introductory term, renewing at $11.99. Introductory rates and renewals change; verify on the checkout page before you buy.
Related articles in Technology
n8n vs Make vs Zapier: Real Costs and Who Each One Fits (2026)
n8n vs Make vs Zapier in 2026: tasks vs credits vs executions, what the same workflow really costs, free tiers compared, and who each tool fits, from someone who self-hosts n8n.
Is n8n Free? Pricing and Self-Hosting Explained (2026)
Is n8n free? Yes, self-hosted. What the Community Edition includes, what n8n Cloud costs in 2026, the license catch, and the real monthly bill, from someone running it.

Build an Email Triage Agent with n8n (2026 Guide)
A step-by-step build of the n8n agent that sorts my inbox: Gmail trigger, LLM classification, labels, reply drafts, and one morning digest. Prompts, settings, costs and mistakes included.
Get new Blogtechi articles by email.
Get the latest insights on AI, automation, and future tech delivered to your inbox. You confirm your address first and can unsubscribe at any time.
By subscribing, you agree to our Privacy Policy and Terms of Service.